When we put our bodies through rigorous workouts, our muscles can become tight and sore, especially the next day. Most people would argue that a good cool down and stretching session afterwards would alleviate this but sometimes we need more than just a good stretch. This is where foam rolling comes in. Following are some tips of how to use a foam roller and some good foam rolling exercises for recovery.
What is Foam Rolling?
Foam rolling is a type of self-massage that release the myofascial tissue of the muscle by using a long cylinder of hard foam to roll out the tension. You can buy foam rollers at almost any department store or sports store chain. They come in all shapes and sizes and some are even notched for a more advanced massage.
Foam rolling has been used for decades my athletes and professionals to release muscle tension not just after a hard workout or game but also beforehand to target any known muscles prone to injury and prep them for exercise.
Now, anyone can use foam rolling to do this with just one tool and a little knowledge, like reading this article.
How to Use Foam Rolling
The best way to use foam rolling is to apply it to points on the body that you know are causing pain or tension. You can also use it after a workout on known trouble spots to reduce DOMS, or delayed onset muscle soreness, which is the muscle soreness that you feel a day or two after you exercise.
Foam rolling should be done extremely slow and at times, at a full stop when you find you’ve hit the spot where it needs extra attention. After a few seconds or more, you can move on when the pain has alleviated.
Common Foam Rolling Exercises for Recovery
Here are some common foam rolling moves that you can use to relieve your tight muscles.
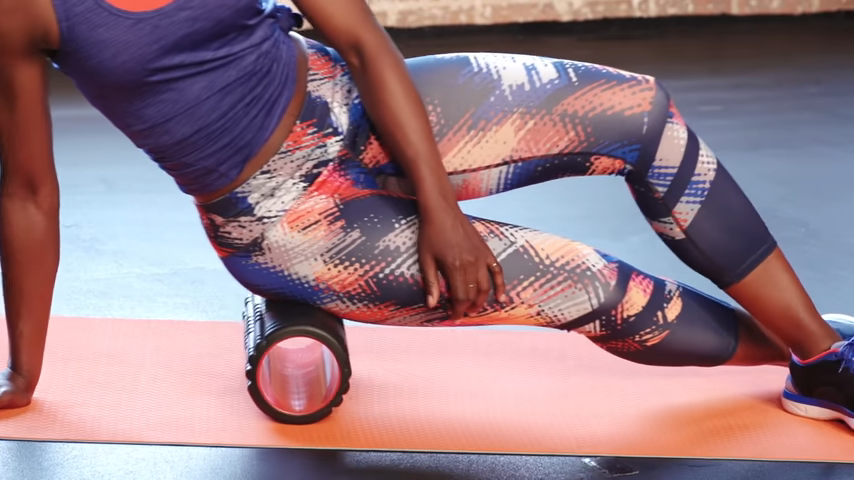
IT Band Release – Foam Rolling Exercises for Recovery

Get on your side with your legs extended and stacked. Place the foam roller on the floor under your legs right above where your knee hits the floor. Using your elbow for stabilizing, roll your body up onto the foam roller and slowly roll it across the foam roller from the point above your knee until you reach just below the hip.
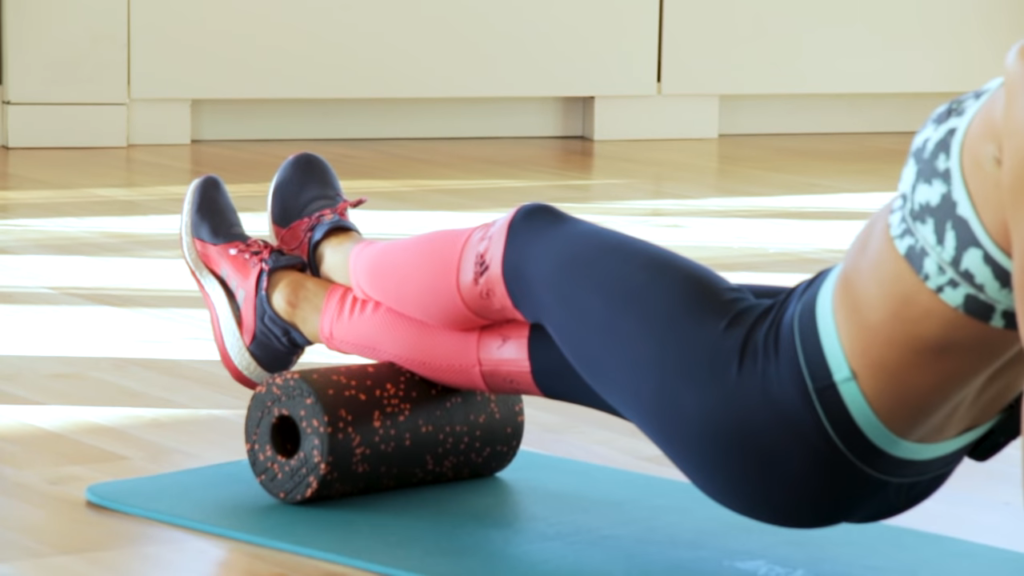
Calf Release – Foam Rolling Exercises for Recovery

This move is commonly used by runners. Sit on the floor and put the foam roller under the spot right above the ankle of just one leg. Bend the other leg with the foot flat on the floor and your arms behind you to stabilizing. Push your butt up off the floor and put your weight on the foam roller. Slowly roll the foam roller up the length of your calf until you reach the top and then roll it back down.
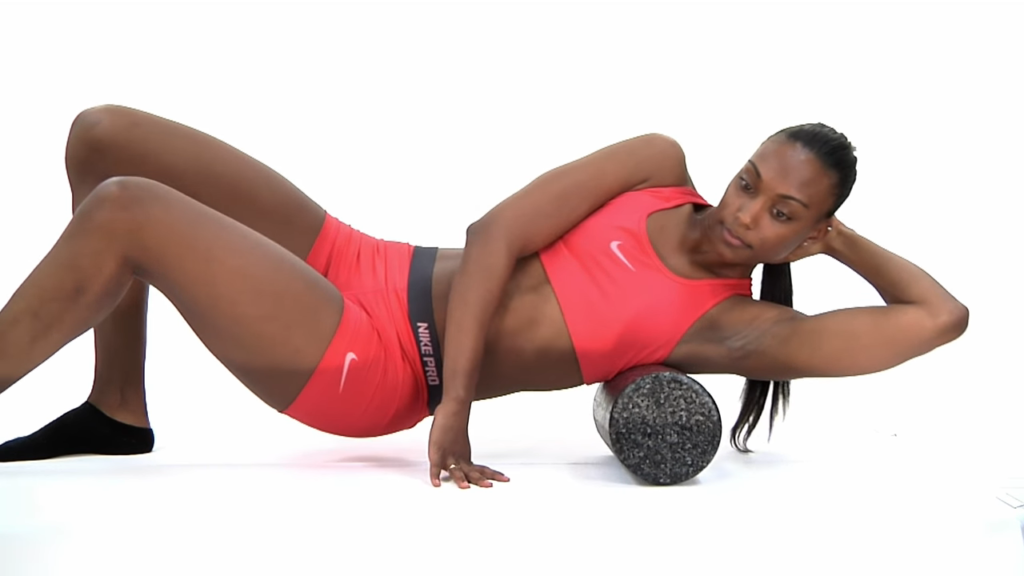
Deltoid Release – Foam Rolling Exercises for Recovery

Lay on your right side with your right arm extended and your left leg bent and placed on the floor behind your extended right leg. Place the foam roller under your torso, just below your chest. Push your body slightly up off the floor and onto the foam roller, using your left leg to keep your hip up off the floor. Slowly roll down, having a slight tilt back to really target the delt muscles. Repeat on the other side.
It hurts. Am I doing it wrong?
Foam rolling is going to be uncomfortable, and it should be. Just like stretching, you known it’s working when your muscles are feeling slightly in pain. In fact, when you foam roll, you don’t want to stop until your muscle pain is mostly alleviated.
The great thing about foam rolling is that you are in control. You know exactly where the pain is and when you are feeling too much. You can increase or release the pressure according to your own personal preferences.
Your muscles will be a bit sore the day after you foam roll, but not tight.
The goal is to get your body as close to feeling normal as possible when you are done. You can’t do this without a little bit of discomfort. It’s important to note that it is not recommended that you use foam rolling on a joint or lower back because they need a much more focused pressure, which can be reached using a different tool.
This article originally appeared on LifeBalanceDaily.com.
